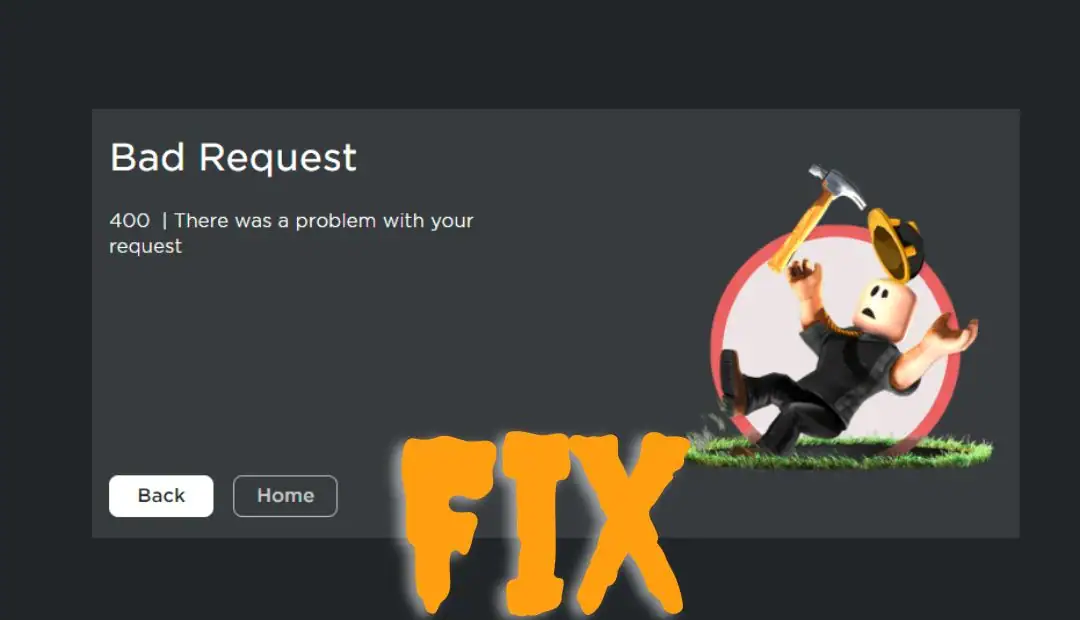
pc games

Counter-Strike 2 Game Crashing On PC

Counter-Strike 2 game crashing is an incredibly popular first-person shooter game that has captured the hearts of millions of players worldwide.

Despite its immense popularity, some players have reported experiencing game crashes during their gameplay sessions.

These crashes can be not only frustrating but also disruptive to the overall gaming experience.

In this blog post, we will delve into the common causes of game crashing in Counter Strike 2 game crashing and explore potential solutions to help players overcome this issue and enjoy uninterrupted gameplay.

Counter-Strike 2 Game Crashing: Dealing with Issues

In the fast-paced world of online gaming, few titles can match the intense competitive edge that Counter Strike 2 game crashing brings to the table.

As avid gamers, we all eagerly await those thrilling moments where we become fully immersed in the virtual battlefield.

However, nothing can be more frustrating than experiencing constant game crashes that disrupt our gameplay and diminish the overall gaming experience.

In this blog post, we will shed light on the various reasons behind Counter-Strike 2 game crashing issues and provide you with practical solutions to combat this vexing problem.

So, buckle up, fellow gamers, as we embark on this Counter Strike 2 game crashing journey to ensure seamless hours of gameplay!

Why is this Counter Strike 2 crash?

This frustrating issue has been a topic of discussion among gamers, causing a significant hindrance to their overall gaming experience.

Crashes can occur for a multitude of reasons, ranging from technical problems to compatibility issues or insufficient hardware requirements.

One potential cause could be an outdated graphics driver, as an incompatible or outdated driver can result in game instability.

Additionally, insufficient system memory or a lack of available storage space might lead to crashes as the game struggles to run smoothly.

Another potential culprit could be conflicts with background applications that consume computer resources, causing the Counter Strike 2 game crashing unexpectedly.

It is crucial for gamers to identify the specific cause of the Counter Strike 2 crash in order to implement effective solutions and restore their playing enjoyment.

How Do i fix Counter Strike 2 Game Crashing:

1. Run as an administrator

  • You’re selected for Desktop showing Counter strike 2 Game.
  • Right-clicking on the Mouse.
  • Then Select the Properties click.
  • Now, Show the top panel in Compatibility.

  • After below you select the Compatibility Mode
  • Next, Choose the option Windows 8.
  • Below Choose this option.

✅Disable full-screen optimizations

✅Run this program as an Administrator

  • get installed the Microsoft Visual C++

5.Delete Local File Delete:

  • Press the Windows key + R to open the Run dialog box.

Counter Strike 2 game crashing

  • Type “%localappdata%” and press Enter.

Counter Strike 2 game crashing

  • Find out the Counter-Strike 2 game crashing File.
  • Navigate to the folder associated with the game you want to delete.
  • Right-click on the game’s folder and select the Delete.

Conclusion

In conclusion, the recurrent issue of Counter-Strike 2 game crashing is undoubtedly frustrating for avid gamers.

Crashes can disrupt the immersive gaming experience and impede progress within the virtual battlefield.

However, it is important to approach this Counter-Strike 2 game crashing with a rational mindset and explore potential solutions.

Firstly, one can try updating their graphics drivers or reinstalling the Counter-Strike 2 game crashing to ensure compatibility and stability.

Additionally, verifying the game files through the Steam platform may resolve any corrupted files causing the crashes.

It is also beneficial to monitor the game’s system requirements and ensure that your computer meets or exceeds these specifications.

Moreover, diligently keeping the Counter-Strike 2 game crashing and related drivers up to date can prevent crashes caused by outdated software.

Lastly, reaching out to the game’s community forums or support channels can provide valuable insights and potential solutions shared by fellow players or the game’s developers.

By employing these approaches and being patient with the troubleshooting process, players can minimize the instances of Counter-Strike 2 game crashing and fully enjoy the game’s exhilarating gameplay and intense multiplayer experience.

  • Press “win+x”  after clicking on Device Manager.
  • Now open it then find Display Adapter click.

  • Then Right-click to Update driver select.

  • Now update the graphics driver.

                                         or

Reinstall Graphics card

3.Set the Performance in Graphics settings✅

  • Open the Settings and Select the Display.

  • Go to Below and Find the Graphics.
  • Select the Game and Open the Options.

  • Click the High Performance.

4. Install Visual C++ Redistributable Download

  • Go to open the Chrome Browser.
  • Type the Microsoft Visual C++ download and search it.
  • See the official page Microsoft C++ redistributable and  click the open it

  • Get download Visual Studio’s latest software
  • Check your system 32bit or 64bit
  • X64 Visual C++
  • or
  • X86 Visual C++
  • get installed the Microsoft Visual C++

5.Delete Local File Delete:

  • Press the Windows key + R to open the Run dialog box.

Counter Strike 2 game crashing

  • Type “%localappdata%” and press Enter.

Counter Strike 2 game crashing

  • Find out the Counter-Strike 2 game crashing File.
  • Navigate to the folder associated with the game you want to delete.
  • Right-click on the game’s folder and select the Delete.

Conclusion

In conclusion, the recurrent issue of Counter-Strike 2 game crashing is undoubtedly frustrating for avid gamers.

Crashes can disrupt the immersive gaming experience and impede progress within the virtual battlefield.

However, it is important to approach this Counter-Strike 2 game crashing with a rational mindset and explore potential solutions.

Firstly, one can try updating their graphics drivers or reinstalling the Counter-Strike 2 game crashing to ensure compatibility and stability.

Additionally, verifying the game files through the Steam platform may resolve any corrupted files causing the crashes.

It is also beneficial to monitor the game’s system requirements and ensure that your computer meets or exceeds these specifications.

Moreover, diligently keeping the Counter-Strike 2 game crashing and related drivers up to date can prevent crashes caused by outdated software.

Lastly, reaching out to the game’s community forums or support channels can provide valuable insights and potential solutions shared by fellow players or the game’s developers.

By employing these approaches and being patient with the troubleshooting process, players can minimize the instances of Counter-Strike 2 game crashing and fully enjoy the game’s exhilarating gameplay and intense multiplayer experience.

  • After Apply button click OK.

2. Update the Graphics driver 

  • Press “win+x”  after clicking on Device Manager.
  • Now open it then find Display Adapter click.

  • Then Right-click to Update driver select.

  • Now update the graphics driver.

                                         or

Reinstall Graphics card

3.Set the Performance in Graphics settings✅

  • Open the Settings and Select the Display.

  • Go to Below and Find the Graphics.
  • Select the Game and Open the Options.

  • Click the High Performance.

4. Install Visual C++ Redistributable Download

  • Go to open the Chrome Browser.
  • Type the Microsoft Visual C++ download and search it.
  • See the official page Microsoft C++ redistributable and  click the open it

  • Get download Visual Studio’s latest software
  • Check your system 32bit or 64bit
  • X64 Visual C++
  • or
  • X86 Visual C++
  • get installed the Microsoft Visual C++

5.Delete Local File Delete:

  • Press the Windows key + R to open the Run dialog box.

Counter Strike 2 game crashing

  • Type “%localappdata%” and press Enter.

Counter Strike 2 game crashing

  • Find out the Counter-Strike 2 game crashing File.
  • Navigate to the folder associated with the game you want to delete.
  • Right-click on the game’s folder and select the Delete.

Conclusion

In conclusion, the recurrent issue of Counter-Strike 2 game crashing is undoubtedly frustrating for avid gamers.

Crashes can disrupt the immersive gaming experience and impede progress within the virtual battlefield.

However, it is important to approach this Counter-Strike 2 game crashing with a rational mindset and explore potential solutions.

Firstly, one can try updating their graphics drivers or reinstalling the Counter-Strike 2 game crashing to ensure compatibility and stability.

Additionally, verifying the game files through the Steam platform may resolve any corrupted files causing the crashes.

It is also beneficial to monitor the game’s system requirements and ensure that your computer meets or exceeds these specifications.

Moreover, diligently keeping the Counter-Strike 2 game crashing and related drivers up to date can prevent crashes caused by outdated software.

Lastly, reaching out to the game’s community forums or support channels can provide valuable insights and potential solutions shared by fellow players or the game’s developers.

By employing these approaches and being patient with the troubleshooting process, players can minimize the instances of Counter-Strike 2 game crashing and fully enjoy the game’s exhilarating gameplay and intense multiplayer experience.

Counter Strike 2 Stuck on loading Fix It

It’s a common frustration for gaming enthusiasts Counter Strike 2 Stuck when their favorite game gets stuck on the loading screen.

Counter Strike 2, a massively popular first-person shooter game known for its immersive gameplay and competitive multiplayer modes, is no exception.

The loading screen, which usually signals the beginning of an exciting gaming session, can suddenly turn into a source of annoyance if it remains stuck for longer than expected.

In this article, we will explore some possible causes for this issue and offer potential solutions that can help gamers get back into the action-packed world of Counter Strike 2 without any further delays.

So, if you find yourself stuck on the loading screen, let’s dive in and see what can be done to overcome this frustrating setback.

Why is Counter Strike 2 Stuck on Loading?

For passionate gamers anxiously waiting to dive into the immersive world of Counter Strike 2 Stuck, encountering the frustration of being stuck on the loading screen can be dreadfully disappointing.

There could be several reasons causing this issue, ranging from minor technical glitches to more complex underlying problems.

Firstly, it’s important to check the basics such as ensuring a stable internet connection and sufficient storage space on your device.

Sometimes, the game’s servers might be experiencing a high volume of traffic or undergoing maintenance, resulting in delays.

In other cases, outdated graphics drivers or conflicting software could be hampering the loading process.

Understanding the potential causes behind this predicament will not only help you resolve the issue swiftly but also allow you to get back to the immersive world of Counter Strike 2 Stuck without further delay.

how do i fix Counter Strike 2 Stuck on loading

1. Restart the computer

  • Press the start menu and click here. 
  • Now the power key icon click here. 

restart laptop with keyboard

  • After showing the Restart click. 

2.Delete Local File Delete:

  • Press the Windows key + R to open the Run dialog box.

  • Type “%localappdata%” and press Enter.
  • Find out the Counter Strike 2 Game File.
  • Navigate to the folder associated with the game you want to delete.
  • Right-click on the game’s folder and select the Delete.

3.Set the Performance in Graphics settings✅

  • Open the Settings and Select the Display.

  • Go to Below and Find the Graphics.
  • Select the Game and Open the Options.

  • Click the High performance.

4. Disable the In-Game Overlay Steam.

  • Launch the Steam client on your computer.
  • Click on “Steam” in the top-left corner of the Steam.

  • Select “Settings” from the dropdown menu.
  • Click on the “In-Game” tab located in the left-hand sidebar.

  • Unselect  the box that says “Enable the Steam Overlay while in-game.”

5. Update the Graphics driver 

  • get installed the Microsoft Visual C++

7.Allow apps windows defender firewall

    • Type “Windows Defender Firewall” in the Windows search bar and select the windows defender firewal.


    • Click on Allow an App or Feature Through Windows Defender Firewall.
    • In the left panel of the Firewall settings window, click on the option labeled Allow an app or feature through Windows Defender Firewall.
    • Click on “Change Settings” (Administrator Permission May Be Required):
    • If prompted for administrator permission, click on Change settings to modify the firewall settings.
    • Scroll through the list of apps and features until you find “Counter Strike 2.” If it’s not listed, click the “Allow another app…” button and browse for the Counter Strike 2 executable file.


  • Counter Strike 2 Stuck


    • Click the “Browse” button and navigate to the folder where Counter Strike 2 is installed 
    • Select the “Counter Strike 2.exe” file and click “Open.”
    • In the same row as “Counter Strike 2,” make sure both the “Private” and “Public” checkboxes are checked.
    • This allows Counter Strike 2 to communicate on both private and public networks.
    • Click “OK” to Save Changes.

Conclusion:

Counter Strike 2 Stuck has undoubtedly established itself as one of the most enthralling and immersive video games of all time.

However, a recurrent issue that players have encountered is the game getting stuck on the loading screen.

This frustrating predicament not only disrupts the gaming experience but also leaves players unsure of what steps to take in order to rectify the problem.

While the exact cause of this issue is multifaceted and may vary from user to user, there are a few potential solutions that can be attempted to overcome this obstacle.

  • Press “win+x”  after clicking on Device Manager.
  • Now open it then find Display Adapter click.

  • Then Right-click to Update driver select.

Payday 3 stuck on loading screen

  • Now update the graphics driver.

                                         or

Reinstall Graphics card

6.install visual C++

  • Go to open the Crome Browser.
  • Type the Microsoft Visual C++ download and search it.
  • See the official page Microsoft C++ redistributable and  click to open it
  • Get download Visual Studio’s latest software
  • Check your system 32bit or 64bit
  • X64 Visual C++
  • or
  • X86 Visual C++
  • get installed the Microsoft Visual C++

7.Allow apps windows defender firewall

    • Type “Windows Defender Firewall” in the Windows search bar and select the windows defender firewal.


    • Click on Allow an App or Feature Through Windows Defender Firewall.
    • In the left panel of the Firewall settings window, click on the option labeled Allow an app or feature through Windows Defender Firewall.
    • Click on “Change Settings” (Administrator Permission May Be Required):
    • If prompted for administrator permission, click on Change settings to modify the firewall settings.
    • Scroll through the list of apps and features until you find “Counter Strike 2.” If it’s not listed, click the “Allow another app…” button and browse for the Counter Strike 2 executable file.


  • Counter Strike 2 Stuck


    • Click the “Browse” button and navigate to the folder where Counter Strike 2 is installed 
    • Select the “Counter Strike 2.exe” file and click “Open.”
    • In the same row as “Counter Strike 2,” make sure both the “Private” and “Public” checkboxes are checked.
    • This allows Counter Strike 2 to communicate on both private and public networks.
    • Click “OK” to Save Changes.

Conclusion:

Counter Strike 2 Stuck has undoubtedly established itself as one of the most enthralling and immersive video games of all time.

However, a recurrent issue that players have encountered is the game getting stuck on the loading screen.

This frustrating predicament not only disrupts the gaming experience but also leaves players unsure of what steps to take in order to rectify the problem.

While the exact cause of this issue is multifaceted and may vary from user to user, there are a few potential solutions that can be attempted to overcome this obstacle.

FC 24 Game Crashing On PC

The world of FC 24 Game Crashing has undoubtedly taken the world by storm, captivating millions of players across various platforms. However, even the most immersive virtual experiences can be plagued by unforeseen glitches and technical issues.

One prevalent concern among PC gamers is the frustrating occurrence of game crashes on their beloved machines. Specifically, FIFA fans have been facing seemingly insurmountable challenges with Fc 24 crashing on their PCs.

In this article, we will delve into the underlying reasons behind this issue, explore potential solutions, and provide some useful tips to ensure a seamless gaming experience for all FIFA enthusiasts.

So, if you’ve recently been plagued by game crashes in FC 24 Game Crashing, fret not, as we’re here to shed some light on this perplexing problem.

Why is this FC 24 game crashing on PC?

One of the most frustrating experiences for any gamer is encountering constant crashes in a beloved game. With the popularity of FC 24 Game Crashing growing, players seem to be encountering frequent crashes on their PCs.

This issue could be caused by various factors such as outdated drivers, incompatible hardware configurations, or even software conflicts.

Game crashes not only disrupt the immersive gaming experience but also waste precious game progress and can lead to a loss of enthusiasm for the game itself.

Gamers are eagerly searching for answers to resolve these crashes and get back to their adventures in FC 24 Game Crashing.

How do I fix the FC 24 Game Controller not working?

1. Run as an administrator

  • You’re selected for Desktop showing Minecraft App.
  • Right-clicking on the Mouse.
  • Then Select the Properties click.
  • Now, Show the top panel in Compatibility.

  • After below you select the Compatibility Mode
  • Next, Choose the option Windows 8.
  • Below Choose this option.

✅Disable full-screen optimizations

✅Run this program as an Administrator

  • get installed the Microsoft Visual C++

5.Delete Local File Delete:

  • Press the Windows key + R to open the Run dialog box.

  • Type “%localappdata%” and press Enter.

FC 24 Game Crashing

  • Find out the Payday 3 Game File.
  • Navigate to the folder associated with the game you want to delete.
  • Right-click on the game’s folder and select the Delete.

Conclusion:

In conclusion, the recurring issue of FC 24 game crashing on PC has become a frustrating problem for many gamers.

Despite the initial excitement of the game’s release, the frequent crashes have dampened the overall experience.

It is evident that there are underlying technical issues that need to be addressed by the developers in order to provide a stable and enjoyable gaming experience for players. Additionally, the lack of effective troubleshooting solutions or patches exacerbates the frustration among PC gamers.

It is crucial that the developers take immediate action to identify and rectify the root cause of the crashes, as this will not only regain the trust of the player base but also maintain the game’s reputation in the long run.

Overall, resolving the FC 24 game crashing issue is key to ensuring a successful and enjoyable gaming experience on PC.

  • Press “win+x”  after clicking on Device Manager.
  • Now open it then find Display Adapter click.

  • Then Right-click to Update driver select.

  • Now update the graphics driver.

                                         or

Reinstall Graphics card

3.Set the Performance in Graphics settings✅

  • Open the Settings and Select the Display.

  • Go to Below and Find the Graphics.
  • Select the Game and Open the Options.

  • Click the High Performance.

4. Install Visual C++ Redistributable Download

  • Go to open the Chrome Browser.
  • Type the Microsoft Visual C++ download and search it.
  • See the official page Microsoft C++ redistributable and  click the open it

  • Get download Visual Studio’s latest software
  • Check your system 32bit or 64bit
  • X64 Visual C++
  • or
  • X86 Visual C++
  • get installed the Microsoft Visual C++

5.Delete Local File Delete:

  • Press the Windows key + R to open the Run dialog box.

  • Type “%localappdata%” and press Enter.

FC 24 Game Crashing

  • Find out the Payday 3 Game File.
  • Navigate to the folder associated with the game you want to delete.
  • Right-click on the game’s folder and select the Delete.

Conclusion:

In conclusion, the recurring issue of FC 24 game crashing on PC has become a frustrating problem for many gamers.

Despite the initial excitement of the game’s release, the frequent crashes have dampened the overall experience.

It is evident that there are underlying technical issues that need to be addressed by the developers in order to provide a stable and enjoyable gaming experience for players. Additionally, the lack of effective troubleshooting solutions or patches exacerbates the frustration among PC gamers.

It is crucial that the developers take immediate action to identify and rectify the root cause of the crashes, as this will not only regain the trust of the player base but also maintain the game’s reputation in the long run.

Overall, resolving the FC 24 game crashing issue is key to ensuring a successful and enjoyable gaming experience on PC.

  • After Apply button click OK.

2. Update the Graphics driver 

  • Press “win+x”  after clicking on Device Manager.
  • Now open it then find Display Adapter click.

  • Then Right-click to Update driver select.

  • Now update the graphics driver.

                                         or

Reinstall Graphics card

3.Set the Performance in Graphics settings✅

  • Open the Settings and Select the Display.

  • Go to Below and Find the Graphics.
  • Select the Game and Open the Options.

  • Click the High Performance.

4. Install Visual C++ Redistributable Download

  • Go to open the Chrome Browser.
  • Type the Microsoft Visual C++ download and search it.
  • See the official page Microsoft C++ redistributable and  click the open it

  • Get download Visual Studio’s latest software
  • Check your system 32bit or 64bit
  • X64 Visual C++
  • or
  • X86 Visual C++
  • get installed the Microsoft Visual C++

5.Delete Local File Delete:

  • Press the Windows key + R to open the Run dialog box.

  • Type “%localappdata%” and press Enter.

FC 24 Game Crashing

  • Find out the Payday 3 Game File.
  • Navigate to the folder associated with the game you want to delete.
  • Right-click on the game’s folder and select the Delete.

Conclusion:

In conclusion, the recurring issue of FC 24 game crashing on PC has become a frustrating problem for many gamers.

Despite the initial excitement of the game’s release, the frequent crashes have dampened the overall experience.

It is evident that there are underlying technical issues that need to be addressed by the developers in order to provide a stable and enjoyable gaming experience for players. Additionally, the lack of effective troubleshooting solutions or patches exacerbates the frustration among PC gamers.

It is crucial that the developers take immediate action to identify and rectify the root cause of the crashes, as this will not only regain the trust of the player base but also maintain the game’s reputation in the long run.

Overall, resolving the FC 24 game crashing issue is key to ensuring a successful and enjoyable gaming experience on PC.

FC 24 Controller Not Working : How to fix It

In today’s fast-paced gaming industry,fc 24 controller true gamer knows the importance of a reliable and functional game controller.

Whether you’re exploring virtual realms or competing in intense multiplayer battles, having a controller that does not work properly can be a real buzzkill.

One particular controller that has generated considerable attention among gamers is the FC 24 game controller. However, even this state-of-the-art device occasionally faces technical glitches that can leave frustrated gamers feeling defeated.

In this blog post, we will explore the common issues faced by FC 24 users when their game controller stops working, and provide practical tips and troubleshooting solutions to get you back in the game with minimal hassle. So, grab a seat, and let’s dive into the world of FC 24 controller troubleshooting!

Why Is My FC 24 Controller Not Working?

The frustration of troubleshooting your controller not working fc 24 can be daunting, especially when you’re eagerly looking forward to an immersive gaming experience.

There are several common reasons why your controller not working fc 24 might not be functioning properly, and it’s essential to tackle each potential issue systematically.

Firstly, ensure that the controller is adequately charged or that the batteries are fresh. Secondly, check if the controller is correctly connected to your gaming platform or device.

Additionally, examine the physical condition of the controller, including any loose or stuck buttons. Lastly, it’s always wise to verify that the controller is compatible with your particular gaming system. By addressing these possible causes, you’ll be one step closer to resolving the problem and getting back to the exhilarating world of gaming.

How do I fix the controller not working fc 24?

1. Update Bluetooth & USB Controller, XBOX Controller 

  • Press “win+x”  after clicking on Device Manager.
  • Now open it then find (Bluetooth, USB & Xbox) Adapter click.

  • Then Right-click to Update drivers select.(Bluetooth, USB & Xbox)
  • Now update the (Bluetooth, USB & Xbox) driver.

2.Select Connected controller in steam

  • Launch the Steam client on your computer.
  • Click on “Steam” in the top-left corner of the Steam.
  • Select “Settings” from the dropdown menu.
  • Click on the “Controller” tab located in the left-hand sidebar.
  • Choose the Correct Controller and Enable it

3.Enable Game Controller in FC 24 game

  • Open the Steam client.
  • Click on the “Library” tab at the top of the Steam client.
  • select the game for FC 24 game.
  • Right-click on the selected game.
  • click on “Properties.”
  • Select the Controller
  • Choose override for FC 24 Game
  • ❌  Disable Steam Input
  • ✅ Use default settings
  • ✅✅Enable Steam Input

4. Disconnect controller/Gamepad

Using USB:

  • If you connected your controller via USB, simply unplug the USB cable from your computer.

Using a PS5:

  • Press the PlayStation button on the controller
  • Open the Control Center.
  • Navigate to the “Accessories” section.
  • Find your controller and select “Disconnect.”

Using an Xbox :

  • Press the Xbox button on the controller to open the guide.
  • Navigate to the Profile & System tab.
  • Choose Settings > Devices & Connections> Accessories.
  • Select your controller, then choose Disconnect.

5. Disable the In-Game Overlay Steam.

  • Launch the Steam client on your computer.
  • Click on “Steam” in the top-left corner of the Steam.
FC 24 Controller
controller not working fc 24
  • Select “Settings” from the dropdown menu.
  • Click on the “In-Game” tab located in the left-hand sidebar.

FC 24 Controller

  • Unselect  the box that says “Enable the Steam Overlay while in-game.”

Conclusion

In conclusion, the FC 24 game controller has failed to meet expectations due to its consistent malfunctioning issues. Despite its sleek design and promising features, many consumers have reported experiencing significant frustrations when using this controller.

The lack of responsiveness, frequent disconnections, and unresponsive triggers have significantly hindered the gaming experience with this particular controller. Gamers rely on their equipment to be reliable and efficient, allowing them to unleash their full potential in virtual worlds.

Unfortunately, the FC 24 game controller falls short of delivering this level of performance. Ultimately, it is crucial for gamers to carefully consider their options and thoroughly research controllers before making a purchase, ensuring they invest in a reliable and high-quality gaming experience.

FC 24 low fps:How to new method

For avid gamers and tech enthusiasts, FC 24 low fps one of the most frustrating issues that can hamper the overall gaming experience is encountering low frames-per-second (FPS) in their favorite games.

When the FPS drops, the once smooth and immersive gameplay turns into a laggy and stuttering mess, leaving players feeling discouraged and disconnected.

Fortunately, with the continual advancements in graphics cards, processors, and optimization techniques, there are several viable solutions to tackle theFC 24 low FPS problem.

In this blog post, we will explore the root causes of low FPS in the popular game FC 24 low fps and discuss effective strategies to boost and optimize FPS for an unparalleled gaming experience.

Why is this FC 24 experiencing low FPS?

It’s a question that many gamers and professionals have been asking as they find themselves struggling to achieve the desired frame rate on their favorite games.

While there could be several reasons behind this issue, one possible explanation lies in the system requirements and compatibility of the graphics card. FC 24 steam, with its high-end graphics and stunning visuals, demands a powerful GPU to render the game smoothly.

With an outdated or underpowered graphics card, the FC 24 experience may be compromised, leading to lower FPS rates. A common dilemma faced by many drone enthusiasts and pilots is the frustrating issue of low frames per second (FPS) on their Flight Controllers (FC) such as the FC 24.

There could be several factors contributing to this problem. Firstly, outdated firmware or software versions on the FC might be causing a lag in processing power, resulting in reduced FPS.
Additionally, improper tuning of the PID (Proportional-Integral-Derivative) values or incorrect configurations could be impacting the FC’s ability to deliver optimizedFC 24 low FPS. Another possible culprit is the low quality or incompatible components used in the drone’s hardware setup, which can significantly impact the FC’s performance.

Identifying the root cause of this issue is crucial in order to find effective solutions and unleash the full potential of the FC 24 low fps. Additionally, other factors such as insufficient RAM, outdated drivers, or even background processes hogging system resources could contribute to the problem.

To resolve this issue, it is crucial to ensure that your hardware meets the game’s recommended specifications, keep your drivers up to date, and disable unnecessary background applications.

By addressing these potential issues, gamers can pave their way to a smoother and more immersive FC 24 steam gaming experience.

How do I fix FC 24 Low FPS?

1. Update the Graphics driver 

  •  Press the win+x key, click the Run open it.
  • After typing the command %localappdata% and ok click.

  • Find the Temp folder or file and open it.
  • Insert select all file ctrl + A press.
  • Delete from this file.

5.Set the Performance in Graphics settings✅

  • Open the Settings and Select the Display.

  • Go to Below and Find the Graphics.
  • Select the Game and Open the Options.

  • Click the High performance.

6.steam launch options.

  • Open the Steam client.
  • Click on the “Library” tab at the top of the Steam client.

  • select the game for you wanted game.
  • Right-click on the selected game.
  • click on “Properties>Genral”
  •  

  • In the “Launch Options” dialog box type in “+fps_max120”.

Conclusion

In conclusion, the FC 24 low FPS issue is a significant concern for users in the gaming community. With a clear need for smooth and uninterrupted gameplay experiences, a low frame rate can greatly hinder the overall experience and enjoyment of any game.

It becomes crucial for developers to address this issue promptly, ensuring optimal performance and providing players with the ability to fully immerse themselves in their gaming adventures.

By investing time and resources into optimizing the FC 24 low fps, developers can meet the expectations of their target audience, and provide an outstanding gaming experience that keeps players hooked for hours on end.  

  • After Apply button click OK.

4.Clear Temp File:

  •  Press the win+x key, click the Run open it.
  • After typing the command %localappdata% and ok click.

  • Find the Temp folder or file and open it.
  • Insert select all file ctrl + A press.
  • Delete from this file.

5.Set the Performance in Graphics settings✅

  • Open the Settings and Select the Display.

  • Go to Below and Find the Graphics.
  • Select the Game and Open the Options.

  • Click the High performance.

6.steam launch options.

  • Open the Steam client.
  • Click on the “Library” tab at the top of the Steam client.

  • select the game for you wanted game.
  • Right-click on the selected game.
  • click on “Properties>Genral”
  •  

  • In the “Launch Options” dialog box type in “+fps_max120”.

Conclusion

In conclusion, the FC 24 low FPS issue is a significant concern for users in the gaming community. With a clear need for smooth and uninterrupted gameplay experiences, a low frame rate can greatly hinder the overall experience and enjoyment of any game.

It becomes crucial for developers to address this issue promptly, ensuring optimal performance and providing players with the ability to fully immerse themselves in their gaming adventures.

By investing time and resources into optimizing the FC 24 low fps, developers can meet the expectations of their target audience, and provide an outstanding gaming experience that keeps players hooked for hours on end.  

  • Press “win+x”  after clicking on Device Manager.
  • Now open it then find Bluetooth Adapter click.

  • Then Right-click to Update driver select.

  • Now update the graphics driver.

2. Adjust Nvidia MRF


  • Open the Search bar
  • Type the Nvidia Control panel and open it.

  • Expand the 3D Settings.
  • Select the Manage 3D Settings.
  • Below Find the Max Frame Rate.

  • Open the Max Frame Rate OFF to ON
  •  Increase FPS rate.

3. Run as an administrator

  • You’re selected for Desktop showing Minecraft App.
  • Right-clicking on the Mouse.
  • Then Select the Properties click.
  • Now, Show the top panel in Compatibility.

  • After below you select the Compatibility Mode
  • Next, Choose the option Windows 8.
  • Below Choose this option.

✅Disable full-screen optimizations

✅Run this program as an Administrator

  • After Apply button click OK.

4.Clear Temp File:

  •  Press the win+x key, click the Run open it.
  • After typing the command %localappdata% and ok click.

  • Find the Temp folder or file and open it.
  • Insert select all file ctrl + A press.
  • Delete from this file.

5.Set the Performance in Graphics settings✅

  • Open the Settings and Select the Display.

  • Go to Below and Find the Graphics.
  • Select the Game and Open the Options.

  • Click the High performance.

6.steam launch options.

  • Open the Steam client.
  • Click on the “Library” tab at the top of the Steam client.

  • select the game for you wanted game.
  • Right-click on the selected game.
  • click on “Properties>Genral”
  •  

  • In the “Launch Options” dialog box type in “+fps_max120”.

Conclusion

In conclusion, the FC 24 low FPS issue is a significant concern for users in the gaming community. With a clear need for smooth and uninterrupted gameplay experiences, a low frame rate can greatly hinder the overall experience and enjoyment of any game.

It becomes crucial for developers to address this issue promptly, ensuring optimal performance and providing players with the ability to fully immerse themselves in their gaming adventures.

By investing time and resources into optimizing the FC 24 low fps, developers can meet the expectations of their target audience, and provide an outstanding gaming experience that keeps players hooked for hours on end.  

FC 24 Stuck on loading screen:How To Fix

In the realm of gaming, FC 24 Stuck on loading screen few things can be as frustrating as encountering a loading screen that seems to go on indefinitely. One such instance that has left gamers bewildered is FC 24 (Fictional Game 24) getting stuck on the dreaded loading screen.

This issue has sparked numerous debates and discussions among both avid gamers and technical experts alike. In this blog post, we will delve into the potential causes behind this phenomenon, explore some troubleshooting tips, and discuss the impacts it can have on the overall gaming experience.

So, if you have ever found yourself helplessly staring at a loading screen in FC 24, this post aims to shed some light on the issue and help you find a possible solution.

Why is the FC 24 stuck on the loading screen?

This is a common concern among many users who are excited to play their favorite games or access various applications on their FC 24 stuck on loading screen device. While it can be frustrating to encounter such an issue, there are several possible reasons behind it.

Firstly, it could be a problem with the software or operating system. It is essential to ensure that the device is up to date with the latest software version and that any pending updates are installed. Additionally, a lack of available storage on the device can also cause it to FC 24 stuck on loading screen.

Clearing unnecessary files or moving data to an external storage device can help alleviate this issue. Furthermore, a weak internet connection or server-related problems can lead to extended loading times.

Troubleshooting the internet connection or contacting the application’s support team can assist in resolving FC 24 stuck on loading screen. By addressing these potential causes, users can hopefully resolve the FC 24 stuck on loading screen problem and enjoy a smooth and uninterrupted experience on their device.

How do i fix FC 24 Stuck on loading screen:

1. Restart the computer

  • Press the start menu and click here. 
  • Now the power key icon click here. 

restart laptop with keyboard

  • After showing the Restart click. 

2.Delete Local File Delete:

  • Press the Windows key + R to open the Run dialog box.

  • Type “%localappdata%” and press Enter.
  • Find out the FC 24 Game File.
  • Navigate to the folder associated with the game you want to delete.
  • Right-click on the game’s folder and select the Delete.

3.Set the Performance in Graphics settings✅

  • Open the Settings and Select the Display.

  • Go to Below and Find the Graphics.
  • Select the Game and Open the Options.

  • Click the High performance.

4. Disable the In-Game Overlay Steam.

  • Launch the Steam client on your computer.
  • Click on “Steam” in the top-left corner of the Steam.

  • Select “Settings” from the dropdown menu.
  • Click on the “In-Game” tab located in the left-hand sidebar.

  • Unselect  the box that says “Enable the Steam Overlay while in-game.”

5. Update the Graphics driver 

  • get installed the Microsoft Visual C++

7.Allow apps windows defender firewall

    • Type “Windows Defender Firewall” in the Windows search bar and select the windows defender firewal.


    • Click on Allow an App or Feature Through Windows Defender Firewall.
    • In the left panel of the Firewall settings window, click on the option labeled Allow an app or feature through Windows Defender Firewall.
    • Click on “Change Settings” (Administrator Permission May Be Required):
    • If prompted for administrator permission, click on Change settings to modify the firewall settings.
    • Scroll through the list of apps and features until you find “FC 24.” If it’s not listed, click the “Allow another app…” button and browse for the FC 24 executable file.


  • FC 24 Stuck on loading screen


    • Click the “Browse” button and navigate to the folder where FC 24 is installed 
    • Select the “FC 24.exe” file and click “Open.”
    • In the same row as “FC 24,” make sure both the “Private” and “Public” checkboxes are checked.
    • This allows FC 24 to communicate on both private and public networks.
    • Click “OK” to Save Changes.

Conclusion:

After a thorough analysis of the issue at hand, it is evident that many users are experiencing difficulties with the Conclusion FC 24 stuck on loading screen game being stuck on the loading screen.

This issue not only hampers the gaming experience but also frustrates players who were eagerly anticipating an immersive and uninterrupted gameplay session.

Although the exact cause of this problem remains uncertain, it is likely attributed to compatibility FC 24 stuck on loading screen, network connectivity problems, or even technical glitches within the game itself.

In order to resolve this FC 24 stuck on loading screen, gamers are advised to try various troubleshooting steps such as clearing cache, restarting the device, or reinstalling the game.

Furthermore, connecting to a stable and faster internet connection may also aid in resolving FC 24 stuck on loading screen. It is crucial for game developers to address and resolve this problem promptly, as a seamless and enjoyable user experience is pivotal in ensuring the success and popularity of any gaming application.

  • Press “win+x”  after clicking on Device Manager.
  • Now open it then find Display Adapter click.

  • Then Right-click to Update driver select.

Payday 3 stuck on loading screen

  • Now update the graphics driver.

                                         or

Reinstall Graphics card

6.install visual C++

  • Go to open the Crome Browser.
  • Type the Microsoft Visual C++ download and search it.
  • See the official page Microsoft C++ redistributable and  click to open it
  • Get download Visual Studio’s latest software
  • Check your system 32bit or 64bit
  • X64 Visual C++
  • or
  • X86 Visual C++
  • get installed the Microsoft Visual C++

7.Allow apps windows defender firewall

    • Type “Windows Defender Firewall” in the Windows search bar and select the windows defender firewal.


    • Click on Allow an App or Feature Through Windows Defender Firewall.
    • In the left panel of the Firewall settings window, click on the option labeled Allow an app or feature through Windows Defender Firewall.
    • Click on “Change Settings” (Administrator Permission May Be Required):
    • If prompted for administrator permission, click on Change settings to modify the firewall settings.
    • Scroll through the list of apps and features until you find “FC 24.” If it’s not listed, click the “Allow another app…” button and browse for the FC 24 executable file.


  • FC 24 Stuck on loading screen


    • Click the “Browse” button and navigate to the folder where FC 24 is installed 
    • Select the “FC 24.exe” file and click “Open.”
    • In the same row as “FC 24,” make sure both the “Private” and “Public” checkboxes are checked.
    • This allows FC 24 to communicate on both private and public networks.
    • Click “OK” to Save Changes.

Conclusion:

After a thorough analysis of the issue at hand, it is evident that many users are experiencing difficulties with the Conclusion FC 24 stuck on loading screen game being stuck on the loading screen.

This issue not only hampers the gaming experience but also frustrates players who were eagerly anticipating an immersive and uninterrupted gameplay session.

Although the exact cause of this problem remains uncertain, it is likely attributed to compatibility FC 24 stuck on loading screen, network connectivity problems, or even technical glitches within the game itself.

In order to resolve this FC 24 stuck on loading screen, gamers are advised to try various troubleshooting steps such as clearing cache, restarting the device, or reinstalling the game.

Furthermore, connecting to a stable and faster internet connection may also aid in resolving FC 24 stuck on loading screen. It is crucial for game developers to address and resolve this problem promptly, as a seamless and enjoyable user experience is pivotal in ensuring the success and popularity of any gaming application.

How To Fix Payday 3 stuck on loading screen

Payday 3 stuck on loading screen, the highly anticipated sequel of the popular heist-themed video game series, has captured the attention of gamers worldwide. However, the excitement surrounding the game has been overshadowed by a recurring issue that players are encountering – a persistent loading screen problem.

This glitch, which leaves players stuck in limbo, has caused frustration and disappointment among avid Payday fans eagerly waiting to delve into the thrilling world of heists and robberies. In this blog post, we will explore the causes behind this loading screen dilemma, its impact on the gaming experience, and potential solutions that game developers can implement to address this issue and provide players with the seamless and immersive gameplay they deserve.

why this Payday 3 stuck on loading screen

One plausible explanation for Payday 3 being stuck on the loading screen stems from the complexity of modern gaming software. Developing games as intricate and immersive as Payday 3 inevitably requires an extensive amount of coding and optimization.

With an ambitious vision in mind, the developers may have encountered unforeseen technical difficulties in streamlining the game’s loading process. This could result in occasional challenges when retrieving and loading the vast array of information needed to bring the game to life.

Furthermore, as technology evolves rapidly, developers may find themselves constantly adapting their code to ensure compatibility with new hardware requirements, which can disrupt the stability of loading sequences. Another factor contributing to Payday 3’s loading screen issue could be the sheer popularity of the game.

With a massive fanbase eagerly awaiting its release, both on PC and console platforms, the servers may experience overwhelming traffic, resulting in slower loading times or even the dreaded loading screen freeze. These issues become more pronounced if the game’s servers were not properly prepared to handle the influx of players during peak hours or shortly after release.

How To Fix Payday 3 Stuck On Loading Screen

1. Restart the computer

  • Press the start menu and click here. 
  • Now the power key icon click here. 

restart laptop with keyboard

  • After showing the Restart click. 

2.Delete Local File Delete:

  • Press the Windows key + R to open the Run dialog box.

  • Type “%localappdata%” and press Enter.
  • Find out the Payday 3 Game File.
  • Navigate to the folder associated with the game you want to delete.
  • Right-click on the game’s folder and select the Delete.

3.Set the Performance in Graphics settings✅

  • Open the Settings and Select the Display.

  • Go to Below and Find the Graphics.
  • Select the Game and Open the Options.

  • Click the High performance.

4. Disable the In-Game Overlay Steam.

  • Launch the Steam client on your computer.
  • Click on “Steam” in the top-left corner of the Steam.

  • Select “Settings” from the dropdown menu.
  • Click on the “In-Game” tab located in the left-hand sidebar.

  • Unselect  the box that says “Enable the Steam Overlay while in-game.”

5. Update the Graphics driver 

  • get installed the Microsoft Visual C++

7.Allow apps windows defender firewall

    • Type “Windows Defender Firewall” in the Windows search bar and select the windows defender firewal.


  •  
    • Click on Allow an App or Feature Through Windows Defender Firewall.
    • In the left panel of the Firewall settings window, click on the option labeled Allow an app or feature through Windows Defender Firewall.
    • Click on “Change Settings” (Administrator Permission May Be Required):
    • If prompted for administrator permission, click on Change settings to modify the firewall settings.
    • Scroll through the list of apps and features until you find “Payday 3.” If it’s not listed, click the “Allow another app…” button and browse for the Payday 3 executable file.


    • Click the “Browse” button and navigate to the folder where Payday 3 is installed 
    • Select the “Payday 3.exe” file and click “Open.”
    • In the same row as “Payday 3,” make sure both the “Private” and “Public” checkboxes are checked.
    • This allows Payday 3 to communicate on both private and public networks.
    • Click “OK” to Save Changes.

Conclusion:

In conclusion, the persistent issue of Payday 3 getting stuck on the loading screen has frustrated gamers and disrupted the immersive gaming experience.

While the developers have attempted to address this issue through various updates and bug fixes, it remains a thorn in the side of dedicated players eagerly awaiting the next installment of the popular franchise.

The loading screen issue not only hampers gameplay but also diminishes the overall enjoyment and satisfaction that players expect from Payday 3.

Hopefully, the developers will be proactive in finding a permanent solution to this problem, ensuring that gamers can fully immerse themselves in the thrilling world of heists and high-octane action without any technical hindrances.


  • Press “win+x”  after clicking on Device Manager.
  • Now open it then find Display Adapter click.

  • Then Right-click to Update driver select.

Payday 3 stuck on loading screen

  • Now update the graphics driver.

                                         or

Reinstall Graphics card

6.install visual C++

  • Go to open the Crome Browser.
  • Type the Microsoft Visual C++ download and search it.
  • See the official page Microsoft C++ redistributable and  click the open it
  • Get download Visual Studio’s latest software
  • Check your system 32bit or 64bit
  • X64 Visual C++
  • or
  • X86 Visual C++
  • get installed the Microsoft Visual C++

7.Allow apps windows defender firewall

    • Type “Windows Defender Firewall” in the Windows search bar and select the windows defender firewal.


  •  
    • Click on Allow an App or Feature Through Windows Defender Firewall.
    • In the left panel of the Firewall settings window, click on the option labeled Allow an app or feature through Windows Defender Firewall.
    • Click on “Change Settings” (Administrator Permission May Be Required):
    • If prompted for administrator permission, click on Change settings to modify the firewall settings.
    • Scroll through the list of apps and features until you find “Payday 3.” If it’s not listed, click the “Allow another app…” button and browse for the Payday 3 executable file.


    • Click the “Browse” button and navigate to the folder where Payday 3 is installed 
    • Select the “Payday 3.exe” file and click “Open.”
    • In the same row as “Payday 3,” make sure both the “Private” and “Public” checkboxes are checked.
    • This allows Payday 3 to communicate on both private and public networks.
    • Click “OK” to Save Changes.

Conclusion:

In conclusion, the persistent issue of Payday 3 getting stuck on the loading screen has frustrated gamers and disrupted the immersive gaming experience.

While the developers have attempted to address this issue through various updates and bug fixes, it remains a thorn in the side of dedicated players eagerly awaiting the next installment of the popular franchise.

The loading screen issue not only hampers gameplay but also diminishes the overall enjoyment and satisfaction that players expect from Payday 3.

Hopefully, the developers will be proactive in finding a permanent solution to this problem, ensuring that gamers can fully immerse themselves in the thrilling world of heists and high-octane action without any technical hindrances.


How To Fix Valorant Error Code 43 Fix!

  Valorant error code 43 is one of the most popular multiplayer shooting games worldwide, developed by Riot Games. However, players often face several technical issues while playing the game. One of the common errors they encounter is the Valorant Error Code 43. This error code mostly occurs due to incomplete installation or corrupted game files. It can also appear due to an outdated or missing Windows Operating System component, or incompatible graphics card driver. To fix Valorant Error Code 43, players can try restarting the game client, updating game files or drivers, or running an antivirus program to resolve any potential corruption issues. With the right steps, Valorant Error Code 43 can be quickly resolved, and players can continue enjoying the game without any hindrances.  

Why This Valorant Error Code 43


Valorant, the popular first-person shooter game that has taken the gaming world by storm, has recently been plagued by a new error code – error code 43.


This error is causing frustration among gamers, who cannot access the game or play it properly.


While the error code may seem like a minor issue on the surface, it is actually a growing concern for the gaming industry.


Gamers invest a lot of time and money into their gaming experiences, and errors like code 43 can ruin that experience and cause them to lose valuable progress.


As such, it is important for developers to address this problem quickly to ensure that the game remains enjoyable for all its users.


 How To Fix Valorant Error Code 43

1. Restart the computer

  • Press the start menu and click here. 
  • Now the power key icon click here. 
restart laptop with keyboard
  • After showing the Restart click. 

2. Reset IP configuration

  • Go to the Search bar and click type cmd.
  • Command prompt right-click Run as an administrator click.
  • After Yes click to open its command prompt.
  • Below is the command following copy and paste to press enter.
Ipconfig /flushdns
Ipconfig /release
Ipconfig /all
Ipconfig /renew
netsh winsock reset
  • After trying to Roblox open to play the game.

Repair/Reinstall Valorant:

  • If none of the above steps work,
  • you can try repairing or reinstalling Valorant.
  • To repair, open the Riot Games Launcher,
  • click on the Valorant tab, and click the gear icon next to the “Play” button.
  • Select “Repair” from the dropdown menu.
  • If that doesn’t work, uninstall Valorant and then reinstall it.

other methods

Are you experiencing Valorant Error Code 43 and looking for a solution? Don’t worry, you’re not alone!

This error typically occurs when there is an issue with your graphics card drivers or when the game is unable to access your GPU.

To fix Valorant Error Code 43, there are a few troubleshooting steps you can try. Firstly, make sure your graphics card drivers are up to date.

Visit the website of your graphics card manufacturer and download the latest drivers for your specific model.

Additionally, ensure that your operating system and game are both updated to their latest versions.

If the problem persists, you might want to try reinstalling Valorant or running it as an administrator.

Remember to also check if there are any pending Windows updates that need to be installed.

By following these steps, you should be able to resolve Valorant Error Code 43 and get back to enjoying your gameplay experience.

conclusion

In conclusion, the Valorant error code 43 can be an infuriating setback for players looking to enjoy a seamless gaming experience.

This particular error typically occurs when there is an issue with the player’s graphics card or driver.

It often leads to game crashes and prevents players from fully immersing themselves in the intense gameplay of Valorant.

However, there are several steps that can be taken to troubleshoot and resolve this error.

Firstly, ensuring that the graphics card meets the game’s minimum requirements and updating the drivers to the latest version can help eliminate the error.

Additionally, running the game in compatibility mode or reinstalling the game can also prove effective.

Taking these steps and staying up-to-date with the latest patches and updates from the game’s developers can drastically minimize the occurrence of error code 43, allowing players to indulge in the thrilling world of Valorant without any hindrances.


How To Fix Valorant error code 59

Valorant error code 59 is a prominent issue that gamers face when playing the popular online multiplayer game.  

The error typically occurs due to issues with the game’s anti-cheat program called Vanguard.

When the Vanguard program fails to validate a player’s credentials or detects unauthorized software on their system, it halts all further gameplay, causing the Error to appear.

While this may be frustrating for players who encounter the error, it’s essential to note that Vanguard’s primary purpose is to maintain fairness and integrity within the game’s ecosystem.

It’s advised to follow the team’s guidelines for troubleshooting and contacting technical support to rectify the error and continue enjoying the exciting Riot game of Valorant.  

why is this valorant error 59 Code?

  Why this Valorant 59 error Code? Since its release in 2020, Valorant has gained immense popularity among gamers worldwide. Unfortunately, like any other game, Valorant is not immune to technical glitches and errors.

One of the most commonly reported Error, which usually occurs when players are trying to launch the game. This error can be frustrating and confusing, especially for new players, as it may prevent them from accessing the game.

Fortunately, there are several ways to fix this error and get back to playing Valorant. In this post, we will discuss what causes this error in Valorant, and how to troubleshoot it effectively.  

 how to fix valorant error code 59

1. Restart the computer

  • Press the start menu and click here. 
  • Now the power key icon click here. 

  • After showing the Restart click. 

2.Run as an administrator

  • You’re selected for Desktop showing Valorant Game.
  • After Clicking on the Mouse.
  • Then Select the Properties click.
  • Now, Show the top panel in Compatibility.
  • After below you select the Compatibility Mode
  • Next, Choose the option Windows 8.
  • Below Choose this option.

✅Disable full-screen optimizations

✅Run this program as an Administrator

  • After Apply button click the ok click.
  •  

3. Reset IP configuration

  • Go to the Search bar and click type cmd.
  • Command prompt right-click Run as an administrator click.

Valorant error code 59

  • After Yes click to open its command prompt.
  • Below is the command following copy and paste to press enter.
Ipconfig /flushdns
Ipconfig /release
Ipconfig /all
Ipconfig /renew
netsh winsock reset
  • After trying to Valorant open to play the game.
4.Repair/Reinstall Valorant:
  • If none of the above steps work,
  • you can try repairing or reinstalling Valorant.
Valorant error code 59
  • To repair, open the Riot Games Launcher,
  • click on the Valorant tab, and click the gear icon next to the “Play” button.
  • Select “Repair” from the dropdown menu.
  • If that doesn’t work, uninstall Valorant and then reinstall it.

How Do i fix Valorant Error 59 Code

If you’ve encountered Valorant error you’re not alone.

This particular error can be frustrating, but fear not, as there are steps you can take to resolve it.

Firstly, ensure that your graphics drivers are up to date. Outdated or incompatible drivers can often lead to errors in gaming platforms.

To update your drivers, simply visit the official website of your graphics card manufacturer and search for the latest drivers compatible with your system.

Additionally, check for any pending Windows updates and install them if available.

Sometimes, an outdated operating system can also cause errors. Finally, try running Valorant as an administrator.

Right-click on the game’s executable file, select “Run as administrator,” and see if this resolves the issue.

By following these troubleshooting steps, you should hopefully be able to fix this error and get back to enjoying your gaming experience without any interruptions.

Conclusion


In conclusion, This Error has become a prevalent issue among players, causing frustration and hindering gameplay experiences.

This error is often attributed to issues with the player’s Riot account, network connectivity, or software conflicts.

It is crucial for players encountering this error to first troubleshoot their network connection and ensure it meets the game’s requirements.

Additionally, updating or reinstalling the game client, repairing the game files, or contacting Riot Games support can be effective steps in resolving this error.

Remember, patience and persistence are key when troubleshooting technical issues in order to fully immerse yourself in the thrilling world of Valorant.


How To Fix Valorant error code van 81 solve

If you are an avid player of the popular first-person shooter game, Valorant, you may have come across the valorant error code van 81.

This error message typically pops up when there is a connection issue between your PC and Riot Games’ servers.

It can be frustrating when you are in the middle of an intense match and suddenly get kicked out due to this error code.

However, there are steps you can take to troubleshoot the issue and get back into the game.

From resetting your internet connection to updating your graphics drivers, there are various solutions you can try to fix the van 81 error code.

So, don’t give up on the game just yet – follow these steps and get back to playing the game you love.


Why this valorant error code van 81


Valorant is one of the most popular first-person games available, with millions of players around the world constantly delving into its immersive gameplay.


Unfortunately, despite its success, Valorant is not immune to technical errors. One of the error codes you may encounter while playing is the infamous “Van 81” error.


This error code is particularly frustrating, as it can suddenly disconnect you from the game, causing you to lose all progress.


But why does this error code appear, and how can you prevent it from happening in the future? Let’s take a closer look.


 How to fix valorant error code van 81

1. Restart the computer

  • Press the start menu and click here.
  • Now the power key icon click here.

Valorant error code van 81

  • After showing the Restart click.

2. Reset IP configuration

  • Go to the Search bar and click type cmd.
  • Command prompt right-click Run as an administrator click.

Valorant error code van 81

  • After Yes click to open its command prompt.
  • Below is the command following copy and paste to press enter.

Ipconfig /flushdns

Ipconfig /release

Ipconfig /all

Ipconfig /renew

netsh winsock reset

  • After trying to Roblox open to play the game.

3. Change the DNS address

Press the win+x key and click the Run to open it.

After typing the command ncpa. cpl and ok click.

Now open it for the Network connection tab.

Then right-click on your connecting network adapter.  

Select the Properties.

Find Internet Protocol version 4 (TCP/IPv4) by clicking on it.

Below click Properties and select Use the following DNS server Addresses.  

Given the use of this value DNS server:  

Preferred DNS server:     8.8.8.8

Alternate DNS server:   8.8.4.4                   

(OR)

Preferred DNS server:     1.1.1.1

Alternate DNS server:   1.0.0.1  

Press OK and close the All tab.
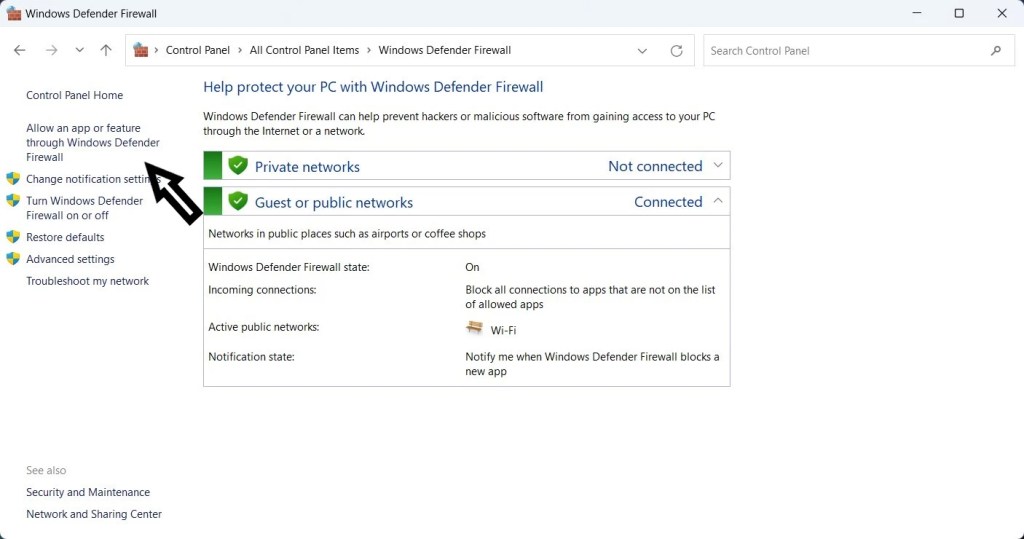
3.Repair/Reinstall Valorant:

  • If none of the above steps work,
  • you can try repairing or reinstalling Valorant.

Valorant error code van 81

  • To repair, open the Riot Games Launcher,
  • click on the Valorant tab, and click the gear icon next to the “Play” button.
  • Select “Repair” from the dropdown menu.
  • If that doesn’t work, uninstall Valorant and then reinstall it.

other methods


If you’ve encountered the Valorant error code VAN 81, don’t worry, as there are several steps you can take to address this issue and get back to enjoying your game.

First and foremost, make sure to check your internet connection and ensure that it is stable.

Unstable or weak connections can often trigger error codes in online games like Valorant.

Refreshing your internet connection or restarting your router might do the trick.

Additionally, ensure that there are no firewalls or antivirus software blocking Valorant’s access to the internet.

Adjusting the firewall settings or temporarily disabling your antivirus software can help resolve the error.

If the issue persists, consider reinstalling the game or updating your graphics drivers as outdated files can sometimes cause conflicts.

By following these troubleshooting steps, you’ll be on your way to fixing the Valorant error code VAN 81 and resuming your gaming experience seamlessly.

conclusion

In conclusion, the Valorant error code VAN 81 has been a persistent issue for players who are encountering it during their gameplay.

This error typically occurs when there is a problem with the player’s internet connection, causing them to disconnect from the game servers.

It is crucial for players to ensure a stable and reliable internet connection to minimize the occurrence of error code VAN 81.

Additionally, regularly updating network drivers and troubleshooting any potential issues with the network hardware can help resolve this error.

Ultimately, addressing the root cause of the error and implementing the necessary fixes will ensure a smoother and uninterrupted gaming experience for Valorant players.