only to be unfulfilled by the Grave not working as expected. fellow voyager, for we’re here to untie the secrecies surrounding this confusing issue. In this item, we’ll joint deep into the empires of ELDEN RING, travelling the reasons late the Grave malfunction and providing keys that will get you backbone.
| [ez-toc] |
WHY ELDEN RING MAUSOLEUM NOT WORKING Working?
Discover into the mausoleum not working users encounter with the Grave. From lading bugs to connectivity interruptions, we sightsee the variability of issues that may be adjourning your gameplay. Uneven connections can wreak destruction on your Crypt involvement. Discover how to recognize if your internet is the perpetrator and ways to tenacity connectivity issues.
Troubleshooting mausoleum compound elden ring not working
Update Your Game
Creators regularly issue patches and updates to address known issues. Guarantee that your Elden Ring game is up-to-date, as this can repeatedly resolve Grave hitches. Check for apprises complete your gaming platform or the certified Elden Ring web site.
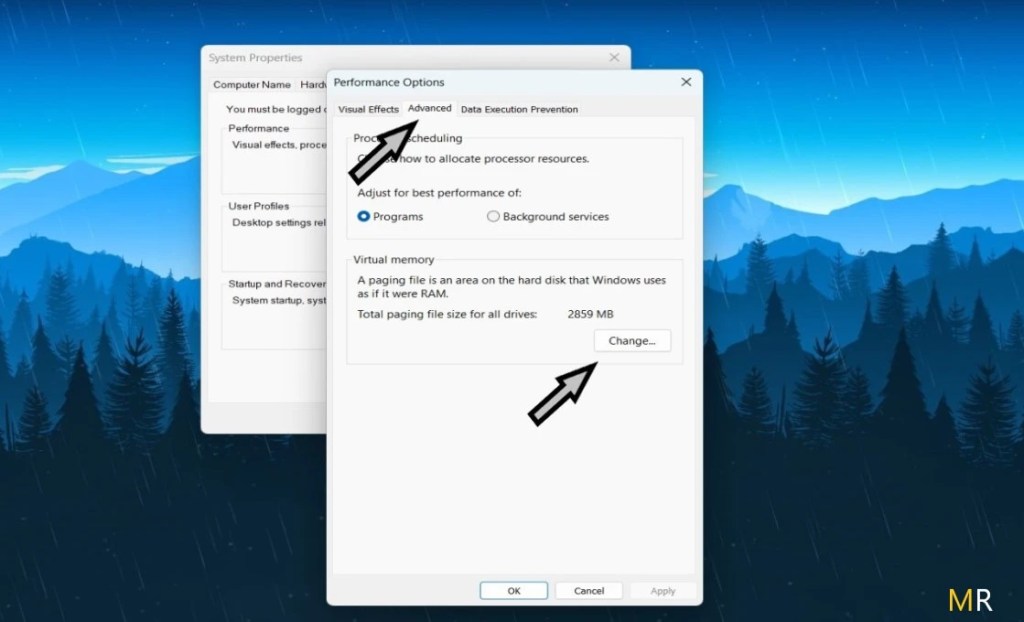
Optimizing Graphics Settings
Graphics settings play a vital role in gaming recital. Altering your graphics sceneries to bout your system’s skills can alleviate Grave issues. Study with diverse settings, conclusion the ideal balance between visual eminence and recital.
- Press “win+x” after clicking on Device Manager.
- Now open it then find Display Adapter click.

- Then Right-click to Update driver select.

- Now update the graphics driver.
or
Reinstall Graphics card
- AMD Official Website:https://www.amd.com/en/support
- Nvidia Graphics driver:https://www.nvidia.com/download/index.aspx
Network Configuration
Mausoleum bugs may shoot from network-related problems. Check your infobahn connection, and if likely, use a wired involving for stability. Port proceeding or varying router settings may also increase online gameplay within the Tomb.
- Go to open the settings app.
- Click on the “Network & Internet” tab.
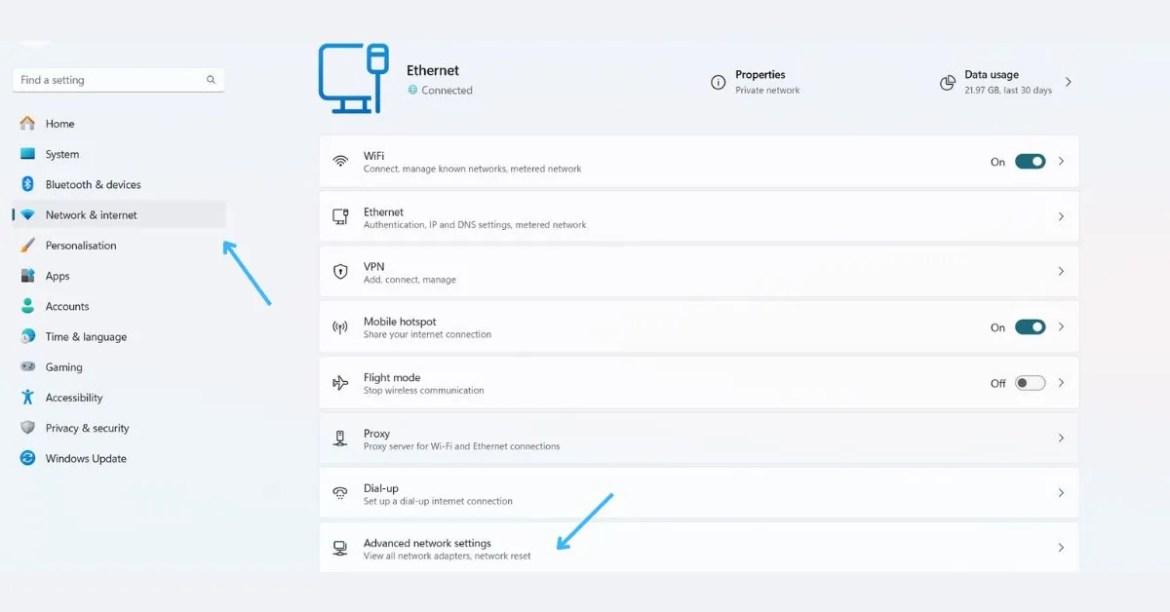
- Scroll to the bottom and click on “network reset.”

- Confirm the action by clicking the “reset now” button.
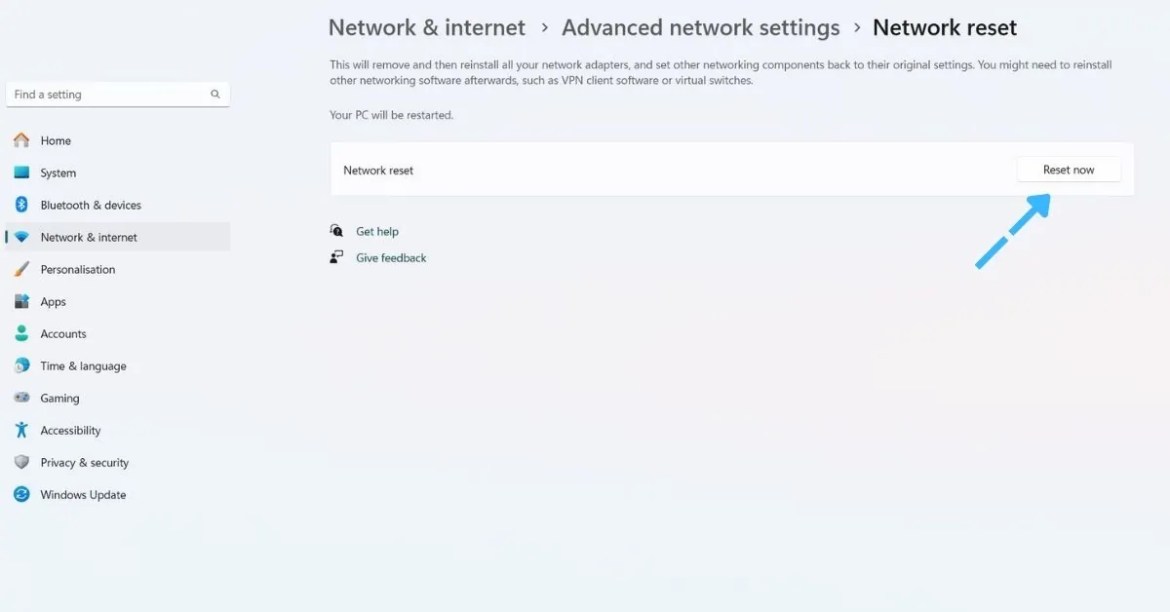
- Allow your computer to restart.
Temporary Files and Cache Cleanup
Collected temporary files and cache data can effect game routine. Routinely clean these files from your having a bet stand to certify optimal Elden Ring Vault functionality.
- Press the win+x key, click the Run open it.
- After typing the command %localappdata% and ok click.

- Find the Temp folder or file and open it.
- Insert select all file ctrl + A press.
- Delete from this file.
Driver Updates
Outdated graphics drivers can major to compatibility issues. Keep your pictures drivers update to ensure even performance inside the Elden Ring Vault. Visit the official internet site of your graphics card manufacturer to move the latest drivers.
Third-Party Software Interference
Some third-party claims may delay with Elden Ring’s recital. Disable or uninstall gratuitous related applications while playing to eradicate potential fights.
Conclusion
Steering the Elden Ring Mausoleum should be a whole and immersive involvement for every player. By kind common issues and executing the troubleshooting techniques drawn in this guide, you can overawed difficulties and unlock the privacies that await within the Mausoleum. Evoke, a well-optimized gaming environment not only growths your Elden Ring experience but also pledges you stay ahead in the expedition through this beautiful gaming universe.
FAQs
-
Is Mausoleum essential for gameplay?
Unconditionally! The Mausoleum not working serves as a vital element in your ELDEN RING mausoleum, connecting you with other players and pretty your overall making a bet experience.
-
Can a slow internet connection affect the Mausoleum’s functionality?
Yes, a slow or uneven internet connection can influence the Mausoleum’s performance. Ensure a stable connection to fully enjoy its features.
-
Are there known bugs causing Mausoleum issues?
Game developers frequently work to abolish bugs. Check for updates and covers to tenacity any notorious issues difficult the Mausoleum.
-
What alternative methods exist if the Mausoleum still isn’t working?
Travelling alternative methods, such as correcting game settings or on the lookout for communal advice, can often afford effective solutions.
-
Will future updates address Mausoleum-related problems?
Categorically! Developers are committed to purifying the gaming experience. Retain an sense out for upcoming apprises that may include fixes and advances for the Mausoleum.